
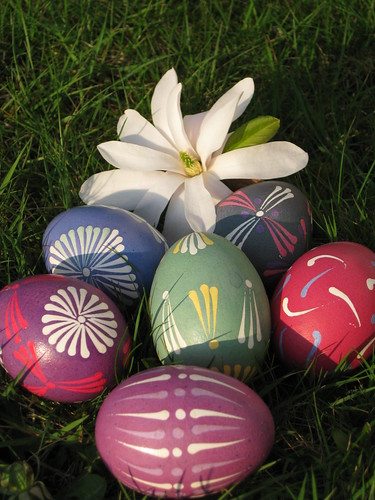
Last year, I shared our family tradition of painting Easter eggs on the Frit Happens forum, but this year, I thought I'd blog about them a bit earlier, to give anybody time to get in on the action. Here's what you need:
- Eggs (no! Really? I hear you say? Yes......the whiter, the better, and scrub of that silly date stamp, if you can)
- Egg dye tablets (easy in Germany - in the UK, search for 'egg dye' on ebay or similar, you're looking for the kind where the egg is dunked into water)
- real beeswax
- lid from a tin of sweets
- pencil with a large-headed pin stuck into the back
- hob/cooker plate (electric)
- jars to make egg dye up in
- kitchen paper
- knife & fat (optional)
1) Put beeswax into tin lid and place on hob, on *low* heat (maybe 4 to get you going, but then, down to 2) - it should be about 5mm deep
2) Make up the dye in the jars (big compot jars work well, or pint glasses) according to instructions
3) Get comfy near the cooker, pick an egg, pick p your pencil (you're 'writing' with the pin head!), dunk it into the wax and *quickly* draw on your egg. You'll only ever get a single stroke or dot done before the wax is hard, so don't try to do more. Start with dots to get your confidence, if you want.
4) Dunk the egg :o) Pick your first colour, dunk - the longer the egg stays in, the more intensive the colour. While egg no. 1 dyes, paint egg no. 2.
5) Take egg no. 1 out when the colour looks right, and leave to dry on the kitchen paper. Once dry, take it back to the stove, and paint on it some more with wax, then dye a different colour.

Repeat the above steps with as many layers of colours as you like and/or have patience for.
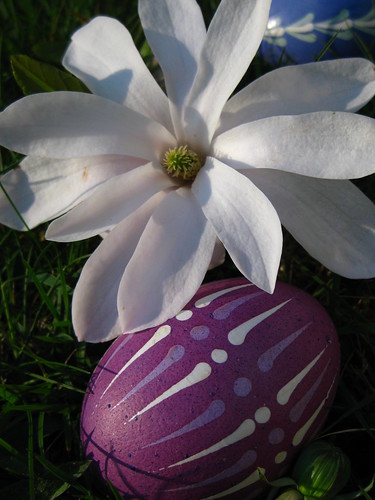
Once all your eggs are painted, dyed and dry, you can either leave them as is, or *very* carefully scrape the wax off with a knife - this looks much nicer, as all the colours shine through properly. As a final step, use some fat (oil, butter, etc.) on a piece of kitchen paper to 'polish' the eggs.
NB: You can either boil eggs first, in which case, let them cool down before dyeing them. If you poke a hole in for boiling, close it with a dot of wax, or else the dye will run into the egg and colour it.
Alternatively, you can paint the eggs raw, then poke a hole in the top and bottom and blow them out - this is hard work, but it means you can leave them to dry before tying a piece of thread around a broken-off matchstick piece, stick it through the hole, and you can then hang it from the egg.
Happy painting, and if anybody has a go, I'd love to see pictures! For anybody interested, this method of egg painting is called 'Pysanky' or drop-pull, and is most prevalent in Eastern Europe. Our family, thanks to my son (seen in a picture from last year below) is now the fifth generation I know of to paint eggs this way.


Ok, and I write you in English :0
ReplyDeleteThe easter eggs looks very pretty, I haven't known this method.
Now I'm following you on your blog :-)
Wish you a wonderful day
xoxo Christel
Und ich in deutsch :-) Die sind fast zu schade zum Essen!!! Superschön!
ReplyDeleteLG Angela
PS: Man könnte sie auch ausblasen, und dann so bemalen :-) Meine Mama hat zig solcher Eier aus Polen, für an den Eierbaum....
Schoen, dass sie euch gefallen - ausblasen tun wir sie auch, aber erst nach dem Malen, sonst schluerfen sie jedes Mal die ganze Osterfarbe, oder, wenn man die Loecher wieder zu macht, schwimmen sie bloss und man kann sie nicht untertauchen.
ReplyDeleteWo du gerade Eierbaum sagst, Angela, ich muss doch glatt mal unsere Eier rausholen und der Forsythie zu Leibe ruecken! :o)))
Hui, die sind schön! Danke für diesen tollen Beitrag! Super auch der Tipp mit dem nachträglichen Ausblasen...ich hätte das zuerst gemacht. :-)
ReplyDeleteLiebe Grüße,
Kati